I had a question in the comments on the firewall rules and IGMP Proxy and pimd based upon the post DLNA: pfSense and IGMP Proxy – nope, use pimd. Unfortunately, I deleted that comment when cleaning out the spam (imagine that – a real comment!). To the commenter: Sorry ’bout that!
Anyway, when I was working on that issue, I had any-any rules in place between the server subnet and and client subnets. Since then, I have put my FreeNAS server in place with separate physical NICs (with VLANs coming – I’ll post on that) so the need to proxy IGMP is no longer an issue.
However, based upon some Google University research, I expect that you would need the following rules between your networks:
IGMP
port 5001 rule (TCP/UDP)
Port 2869 rule (TCP); used for DLNA / uPNP discovery (SSDP)
Port 1900 rule (UDP); used for DLNA / uPNP discovery (SSDP)
I received my second UniFi AP Lite yesterday. The plan was to have two APs in the house – one on each floor – from the beginning. The first AP was mounted in the basement ceiling which provided good coverage for the basement but parts of the main floor and outside the house were spotty. This was likely because of the floor in between the basement and the main floor. Outside was likely due to the concrete walls 🙂
The implementation was almost seamless – except for stupidity on my part. When I configured the port for the new AP, I added the management VLAN which allowed adoption and the firmware upgrade. However, clients could connect but would not maintain connectivity. The UniFi controller showed a boatload of DHCP failures. What was going on?
Well, another case of rushing things. If you have your WiFi network on different VLANs those VLANs also need to be applied to the switch port as well. Otherwise, when a client connects to a WiFi network, which is different from the management network, the switch ports sees the DHCP request and says “I don’t know about network x! Go away!”. Anyway, once I added the correct profile (I love the network profiles that Ubuquity has in their SDN) with all the right VLANs things go as smooth as silk.
So, the network upgrade is now 99% complete. WiFi connectivity is great across the basement and main floor. I can actually now get a reliable, albeit a little weak, WiFi connection in my shed. I still have to replace some cable runs with Cat5e or Cat6 and desperately need to clean up the rat’s nest in the server rack. Maybe Santy Claus will help me out there.
Well, I’m just about finished my core network upgrade that I started, really, last winter. Here’s what has transpired since Christmas (links to posts, etc. in line):
Santa bought me a TP-Link TL-SG1024DE. It gave me the VLANs I was looking for but it didn’t give me everything I was looking for but it worked for now.
The old SonicWall TZ205W was getting a little long in the tooth and I replaced it with a pfSense box.
The Netgear/D-Link access points being manually configured bugged me so I bought a Ubiquiti UniFi AC AP Lite.
Since the TP-Link switch wasn’t doing it for me and I liked the Ubiquiti gear so much I replaced it with a Ubiquiti Switch 24.
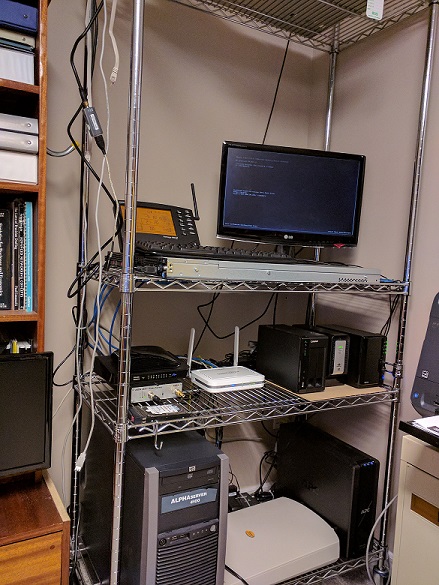
I hated the wire rack I was using for the network and server gear so I replaced it with a homemade one.
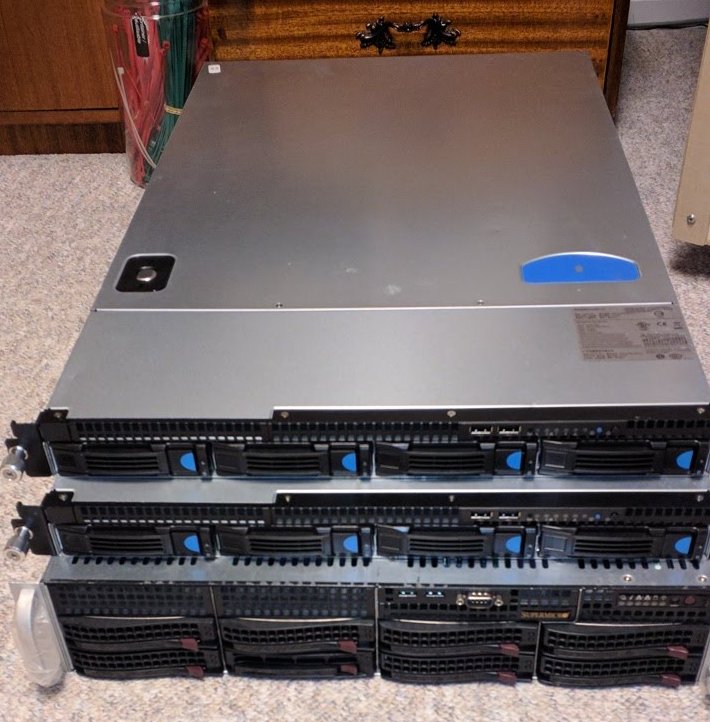
Three NASes were too much even for a geek like me and they needed an upgrade. So three of the NASes, one with an external hardware eSATA disk enclosure, were replaced with a Supermicro Server with FreeNAS.
So, what’s next? There are three empty drive bays in the FreeNAS box. I will eventually be setting up a RAIDZ pool for my ESXi NFS shares. And, of course, there are the two Quanta S98J QSSC 1U rackmount server cases. I need another HBA, external cables, and drives to make them useful.
A quick post on fixing error: environment block too small
I updated my Linux Mint 19.2 which included an updated kernel and this error started occurring at boot before the grub menu. You have to “hit any key to continue” but boot will continue. Very annoying. Removing some of the old kernels didn’t work. The solutions is relatively simple:
sudo rm /boot/grub/grubenv
sudo grub-editenv /boot/grub/grubenv create
This apparently relates to the size of the UEFI partition – or lack thereof. I first came across the issue when trying out System76’s Pop!_OS. I dual boot with Windows 10 (go ARMA Exile mod!) and the UEFI partition was too small. After a whole bunch of, err… farting around, I finally got Pop!_OS to install. Very nice OS but not quite to my taste. Try it out, though, for yourself. It might be your’s!
I’m well on my way through my FreeNAS build. For my boot drive I picked up two Kingston 120GB A400 SSDs on Amazon for CDN$25 each. That is only slightly more expensive than a “good” USB memory stick. These are mirrored and plugged into the two SATA3 (6Gb/s) ports on the motherboard.
The Qnap NAS has been decommissioned with the two 3 TB WD Reds added to FreeNAS. The 3 TB Red my son had “borrowed” for his gaming PC has been “reacquired.” My “spare” 3 TB Red has been added to FreeNAS and I bought another 3 TB Red. That has been made into a RAIDZ2. RAIDZ2 is like RAID6. You get double parity to tolerate multiple disk failures. That gives me 7.4 TB of usable space.
I have two MiniDLNA servers running is jails on the two different subnets getting rid of the IGMP proxy I noted in my previous post. The great thing is that the same volume groups (one for music, one for movies) can both be used by each of the MiniDLNA servers so I don’t need to duplicate storage.
Next item is dealing with NFS, physical interfaces and subnets for sharing space with my ESXi server.
This is more of a note to myself than a real post…
If you have different subnets and want to use a DLNA-based media server it will not work. This is correct by design! DNLA is a local network, broadcast protocol! But, if you have the need it can be done by using an IGMP proxy to pass the network broadcasts across subnets; effectively “routing” it.
Unfortunately, it is broken on pfSense since, it seems, 2.2.x. I even downloaded the most recent version and it still did not work. There is an alternative, pimd.
pimd has to be manually installed and configured on the command line (i.e., ssh into your pfSense box). It is not hard to install or configure. My pimd.conf is simple:
You only need to disable any physical interfaces or VLANs where you don’t want DLNA broadcasts and enable the physical interfaces and VLANs where you do want DNLA broadcasts. I keep a backup copy in a directory since it is not an official package your configuration may be removed by an upgrade.
Also, since this is not an official package you need use shellcmd to enable automatic startup:
/usr/local/sbin/pimd -c /usr/local/etc/pimd.conf
I put in feature request in pfSense’s redmine site to include pimd as a native package.
Well, adding the door to the rack has taken the back burner. Not quite as interesting as I want. However, I think I will need to replace the rack posts with the “square hole” type. I thought that having the telco-style rails – tapped screw holes – would be best but it turns out, and I should have known better – that most equipment rails now come configured for square holes. It is easier – quicker – to mount rails into square holes as you don’t have to, well, screw anything in. :-S
Those four rails cost $100… 🙁
So the summer project is… A new NAS!
As I have posted about over the past number of years, I have three NASes. The old Synology DS211j that I use for iSCSI storage for my VMware ESXi server, a Synology DS216+II for documents and photos and a Qnap TS-219P II for movies and music. Even for me, three NASes is a little excessive. Two deficiencies that I have are: 1) each of these units only has two drive bays – that obviously limits expandability and 2) each of the units only has one network port – which means that to share DLNA services (movies, music) I have to use IGMP proxying to go across subnets. Since I use DLNA, I need good trascoding ability. I also use Docker for the Synology controller and have some more ideas of things to do with Docker.
Phase 1 is to install FreeNAS. I have been messing around with ZFS, jails, etc. for the past month or so. I need to get some more disks; I have two 4 TB WD Reds, err…, ready. I need two more. Once that is done I can start removing the disks from the old Synology and Qnap NASes. But for now, I need to do some more experimentation.
On top are two Quanta S98J QSSC 1U rackmount server cases with 4 x 3.5 hotswap nays. They don’t have power supplies yet. They will be phase 2 of my plan. I will be adding another LSI HBA with two external (or more) SFF ports. On each of the Quanta’s I will be adding an external SFF port (like this) with a 4 cable SATA breakout. Of course, I have to find some affordable power supplies.
Once more note – Supermicro IPMI with KVM is awesome. Right up there with HP iLO or Dell PERC. It lets me sit in a comfortable recliner and watch TV.
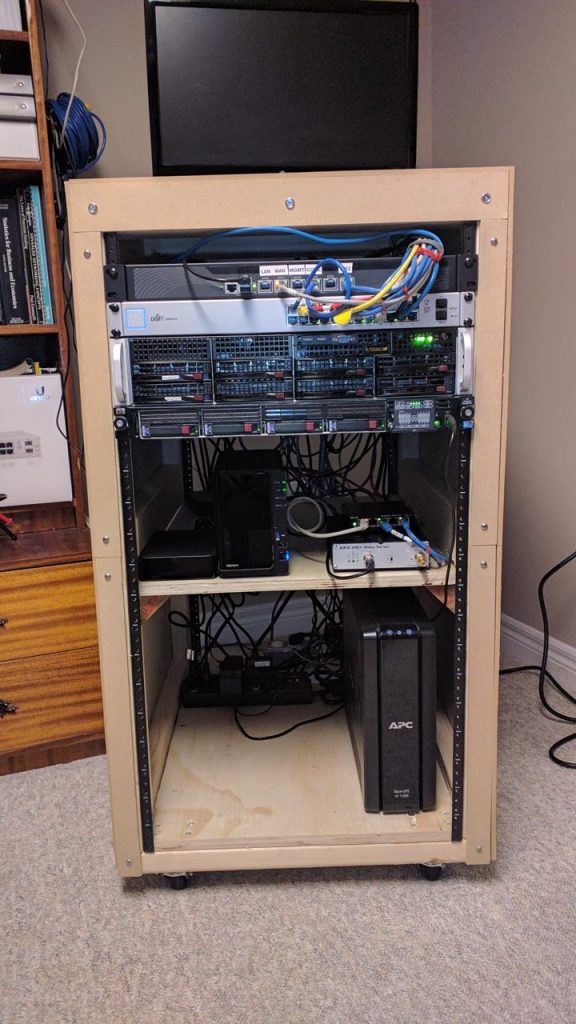
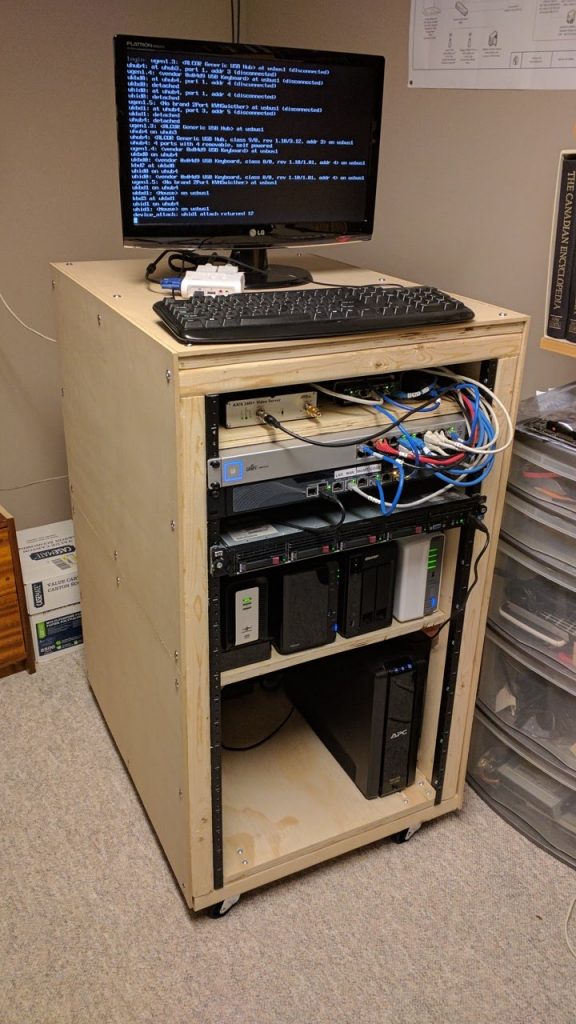
A very quick update: I have the facing completed now. I added back the TP-Link TP-SG1024DE into the rack for some reason… Maybe to fill up space? I might use it for the DMZ instead of the 5-port unmanaged switch. Here is what it looks like now:
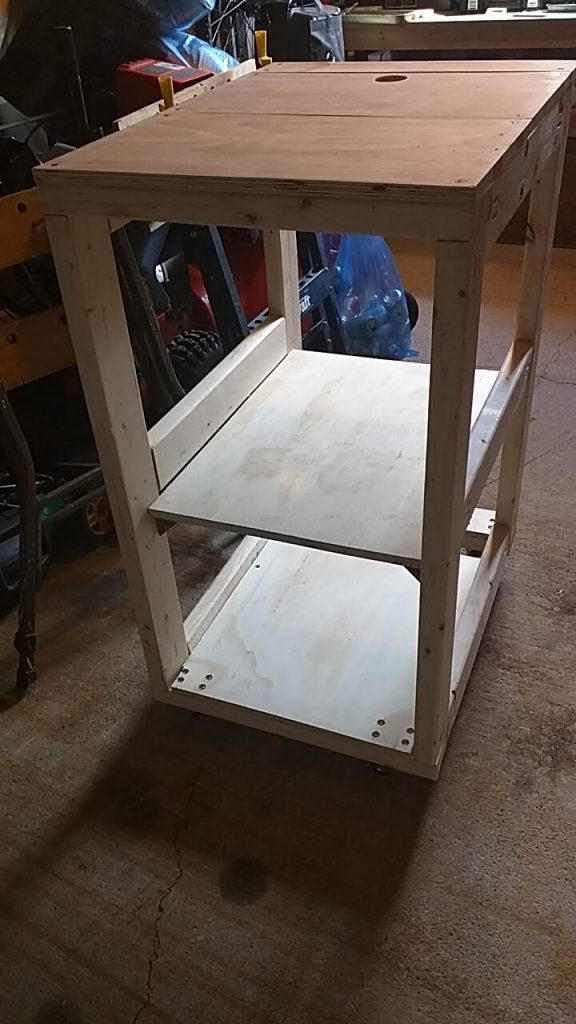
I wanted to put my rack gear in a rack. I have my HP DL360, the pfSense router and my Ubiquti Switch 24 and I didn’t like having them on my wire bakers rack. I didn’t look neat.
When I looked into it buying a half-height rack was over CND$500 (plus shipping and taxes). I found plans for making a rack a Tom Builds Stuff – thanks Tom! Total price: about CND$150.
This is still a work-in-progress. I am putting on some finished sides (that I can easily remove if I need to). I will update this post once I have that done.
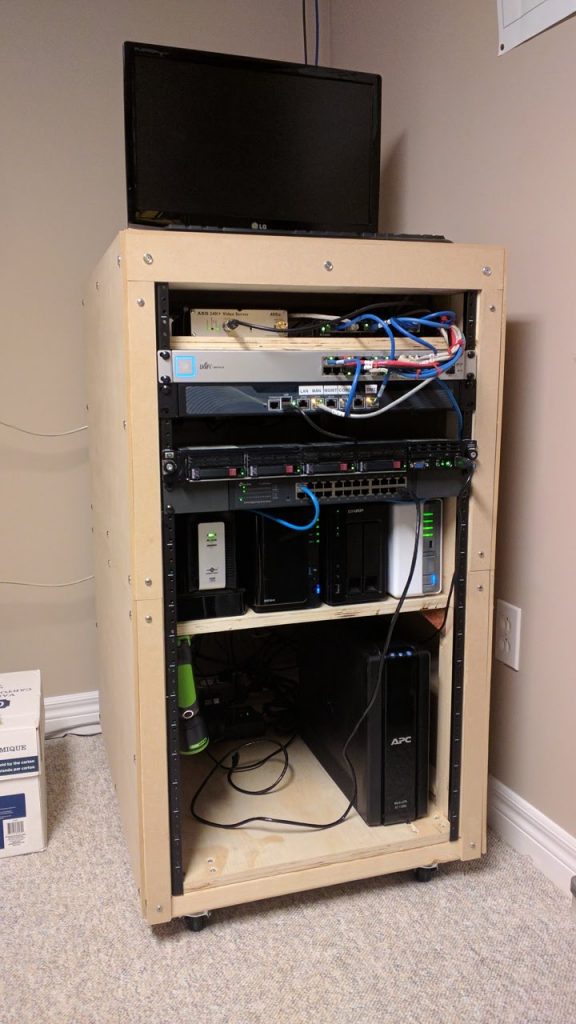
I was going to follow Tom’s plan for the outer enclosure but I clearly realized that I don’t have the skills for finished carpentry and I don’t have all the tools and space required. I also realized that the 2 x 4s that I hand picked are bowed, crooked, kinked, cuped and twisted – yes, all of them.
So I decided to use 1/4 inch Standard Hardboard Panel and used finishing washer and screws to attach the panels to the frame. I decided to use 2 ft. x 4 ft. sheets because I couldn’t get a 4 ft. by 8 ft. sheet in the SUV. The added benefit is that I also can take off one panel if I have to access the upper or lower half from the side. (Glass-half-full thoughts…) Here’s what it looks like now:
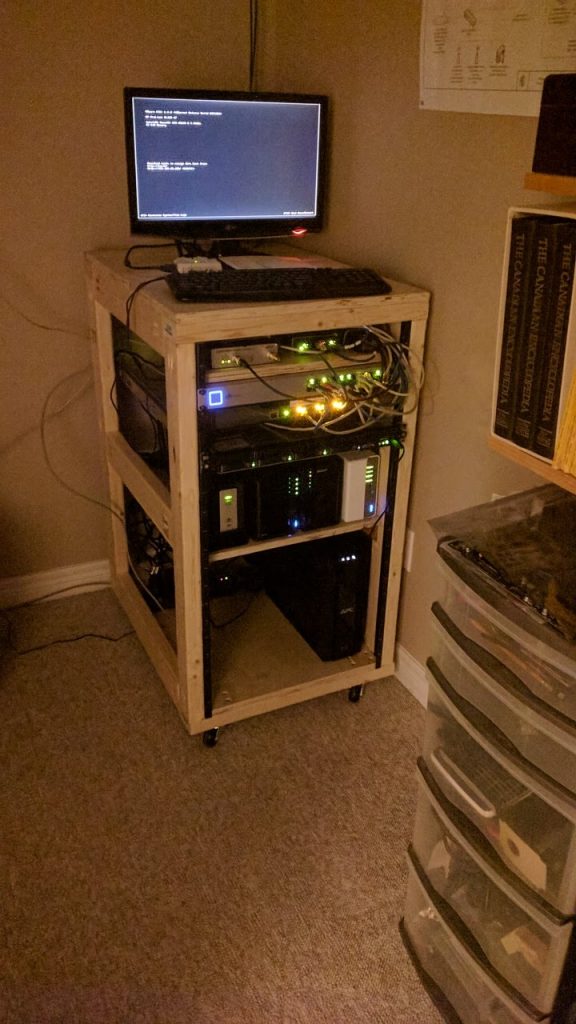
Here’s what it sort-of looked like (before a lot of changes):
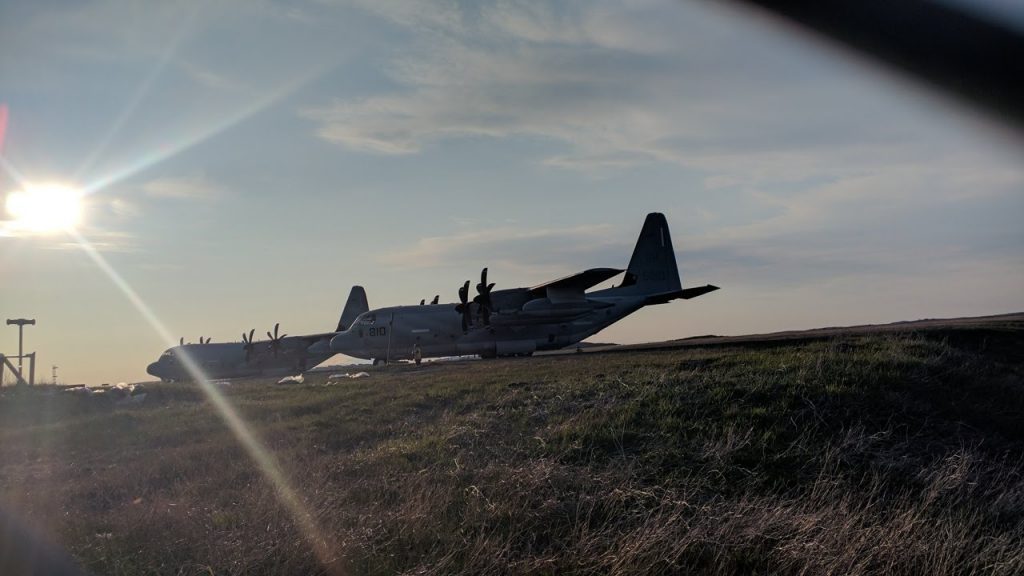
Now for something a little different… Earlier today I heard a “strange” aircraft. I was not quite sure what it was but quickly forgot about it. I happened to be out by the airport when I noticed a couple of USMC C-130Js on the apron. USAF (or Air National Guard) C-130s aren’t all that rare – they often stop off here before staring or ending the hop over the “pond.” USMC, well, that is different.
C-130Js at YYT
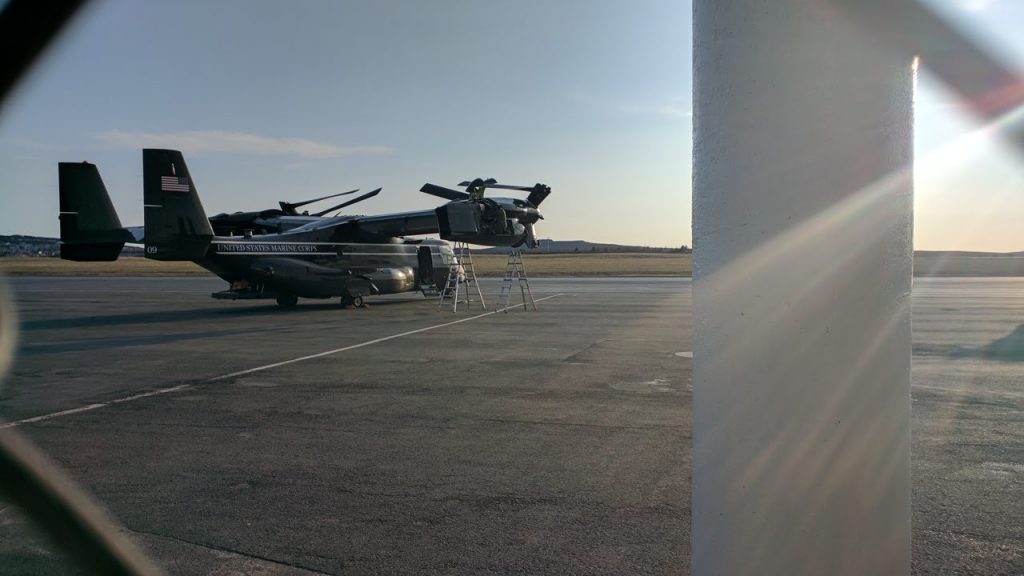
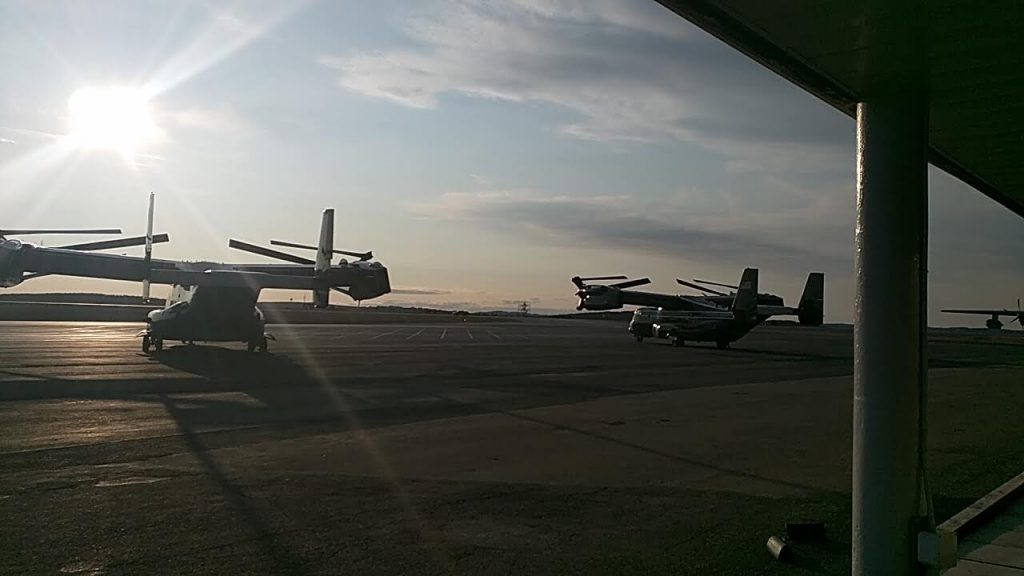
When I went down there were three MV-22B Ospreys on the apron. But not just any Ospreys – they were from HMX-1, the USMC squadron responsible for transporting the United States President (no matter who they are :-)).
HMX-1 MV-22B – Check the oil, please!MV-22B’s don’t know how lucky they are to bask in the sun at YYT