This is, as always, is maybe more of an aide-mémoire for me, but may be helpful if someone else is searching for a solution…
Here is the scenario: My UniFi devices are on a separate subnet from my UniFi Controller. The problem, if you will, with this configuration is that when a UniFi device looks for the UniFi Controller is that is cannot find the Controller on a different subnet.
There are a number of ways that this can be resolved (other than putting the Controller on the same subnet) as documented in UniFi – Device Adoption Methods for Remote UniFi Controllers. The option that I took, or maybe it is two options, is:
I configured my DNS server with an alias that allows unifi to resolve to the UniFi Controller. That way when a device restarts (such as after a reboot, power loss) it can find the controller when it boots and executes the set-inform http://unifi:8080/inform. The hostname unifi will resolve to my UniFi Controller.
In my DHCP configuration (on pfSense), I added DHCP Option 43. You have to add 01:04 to the hex version of the IP address of your UniFi Controller. Browserling has a page to convert the IP address to hex: Convert IP Address to Hex Format.
One important thing to remember: If you statically set the IP addresses of your UniFi devices you will not get the DHCP Option 43 provided to the devices.
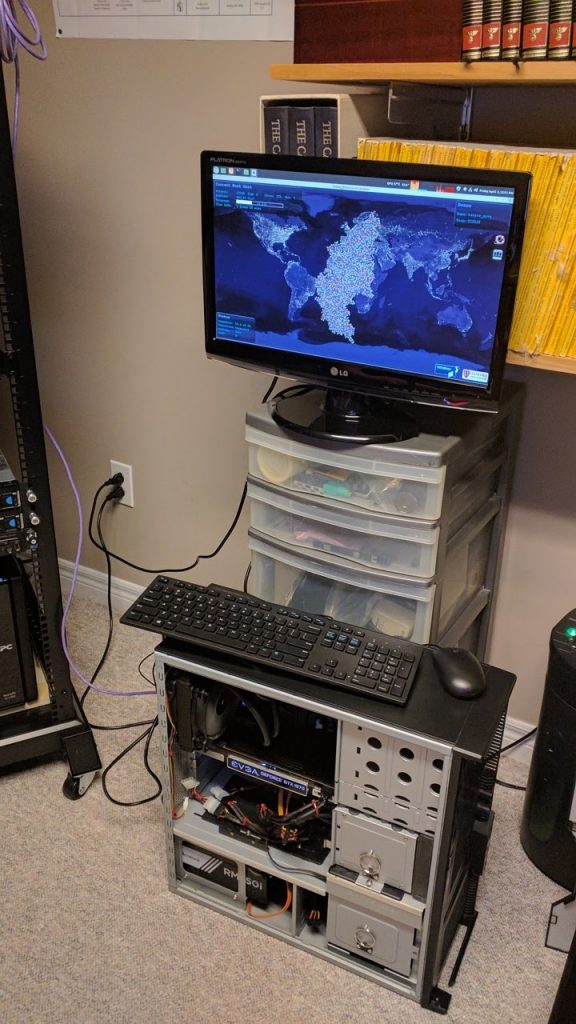
So, I’m working from home in my office and realized that I had my son’s old PC sitting in the corner. Later that night, I was watching Linus Tech Tips and watched a video on using Folding@Home to help find a cure for the COVID-19 (Corona) virus.
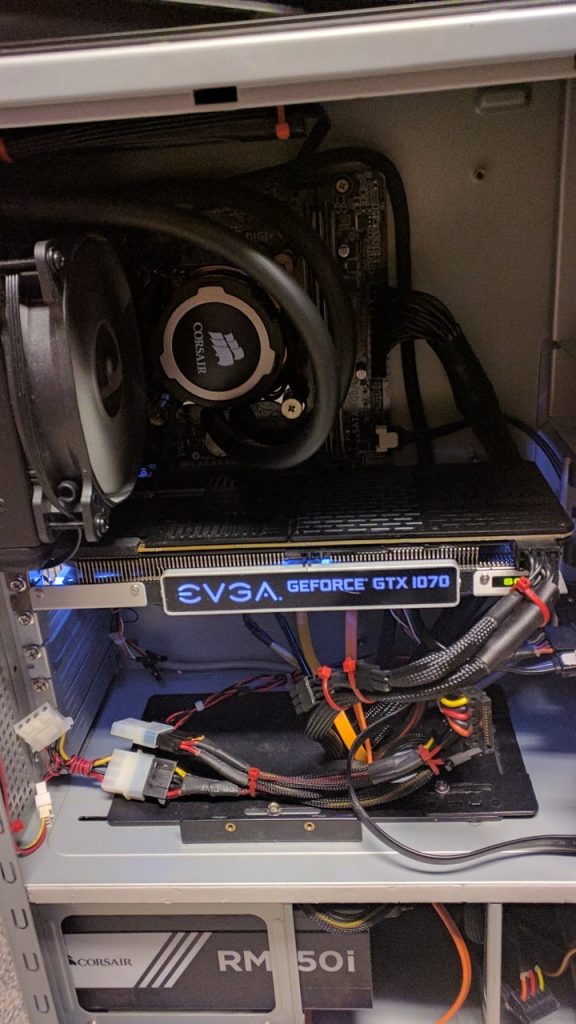
My son’s old PC is an Intel i7-4790K with 16 GB RAM and an EVGA GTX 1070 Superclocked graphics card with a Corsair RM750i power supply and H75 AIO cooler. That seems like a bit of a waste just sitting there.
I loaded up Linux Mint 19.3 on the Samsung Evo 850 500 GB SATA drive and joined LTT’s F@H team. (He’s also a Canadian so – Go Team Canada!)
Good thing it’s still cold outside. The CPU and GPU running at 100% could make it a little toasty…
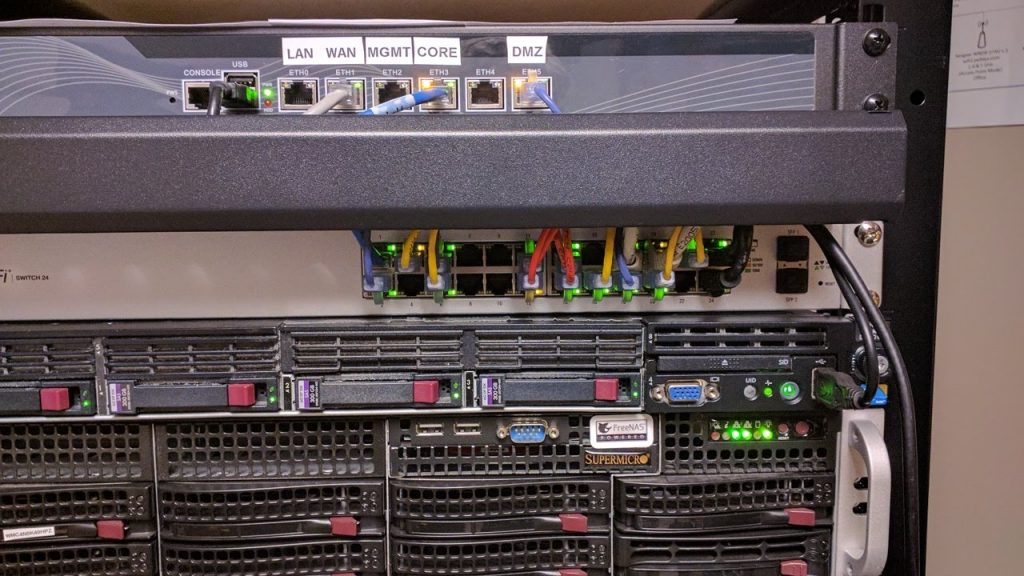
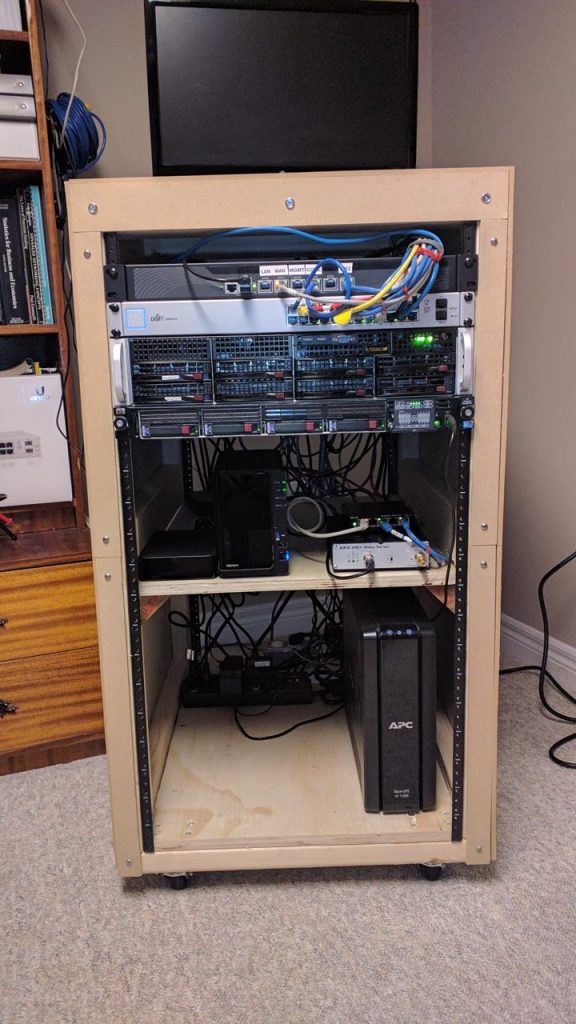
Quick Edit: A close-up view for the fellow geeks out there 🙂
If you look at the previous posts, you can see the old – in some cases, really old – network cables that I was using in the rack. Some of these were even older than my son! They were a mix of various lengths, colours, and ratings. Some were CAT5, some were CAT5A and a couple were even STP (Sheilded Twisted Pair) CAT5. Those STP cables are really stiff. I have no idea where I accumulated them over time.
I was looking to replace them not only because of their age and ratings but also because many of them were too short. It may seem strange that to make your wiring neat that being too short would be a problem. The issue is that you cannot route and arrange short lengths neatly or efficiently. As well, given that both servers are now using the appropriate sliding rails, you may not have enough length to pull a server out.
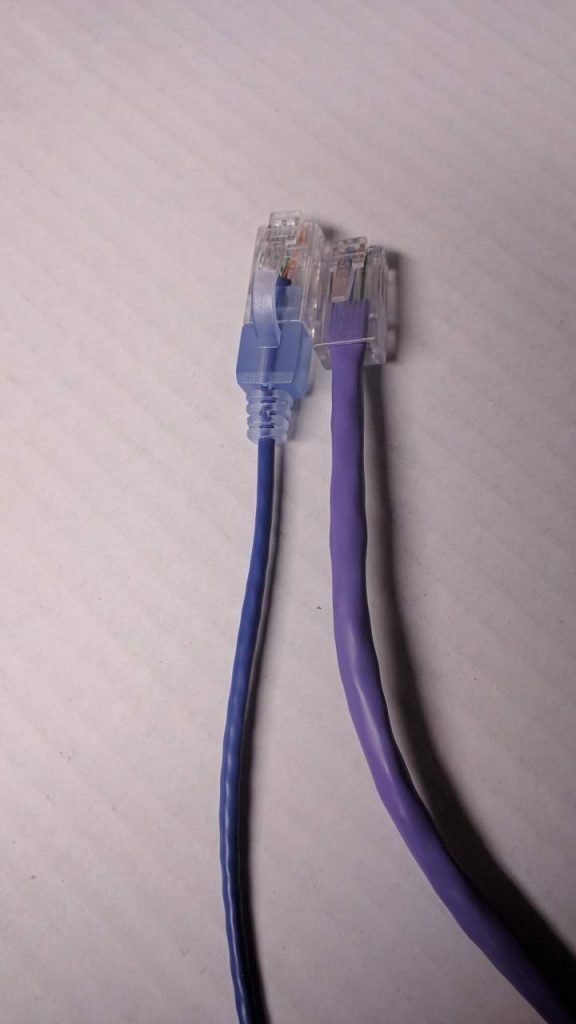
After looking around, I found some SlimRun CAT6A cables from Monoprice. These cables are really thin! Four of the SlimRun cables take up only slightly more space than the old CAT5 cables as you can see with the two types of cables next to each other.
These are great cables because they also have hoods so the clips don’t snag when pulling them through the rest of the cables. The hood also allow you to easily push the clip down when removing a cable.
Now, this is much better. It is easy to route the cables through the loom and you can now see the switch’s indicator lights.
I bought three colours (3 sets of 5): red for the ESX server (that’s the DL360 G7 under the switch); yellow for the FreeNAS server (the Supermicro server under the DL360) and purple for everything else. (Why purple? I donno…)
All that is left is to replace the two keystone wall plate with a six keystone version to make get rid of the wires still hanging down from the ceiling.
In my previous posts, I noted that my homebuilt rack worked well execpt for two issues: (1) I was silly and went with telco threaded rails and (2) I neglected to add the 1/8th inch (3.2mm) thickness of each rail in the width between the 2×4 uprights; that is 1/4 inch (6.5 cm) too narrow.
That, of course, caused two problems. First, the rails for my Supermicro server are made for squre holes and could not be converted to use threaded holes. My DL360 does have adaptable rails whereby the studs could be removed and, with care, could have screws used – I had to line up the screw with the threaded rail holes as it was thread-to-thread between the vertial rails and DL360 rails. That meant that the Supermicro had to rest on top of the DL360. Not the best if I had to slide out either server.
The second problem was that even if I could have mounted the Supermicro rails, there was only a paper-thin gap between the Supermicro chassis and the rack’s rails. Grrr… I could have fixed that problem by taking everything out, getting the router out (after I found a router bit that was long enough for the 1.55 inch (4 cm) depth of the rail) and countersink the rails. I could not take the rack apart because I did such a good job with glue putting the rack together. I would also have to buy four new vertical rails. I couldn’t find 20U square hole rails anywhere and what I could find was 14U at over CDN$75.00 per pair. I would have to buy four (4!) pairs and cut two pairs down. That would be over CND$300.00 just for the rails. I could have search more but anyway…
I found on Amazon when I looking for the square-hole rails a rack from Raising Electronics similar to this one by Sunlight Machinery (they don’t have the 600mm depth rack listed right now) for just over CDN$200. IT was 27U, instead of 20U, but vertical space wasn’t a problem.
The Amazon comments noted that you need to chase out the threads before assembly because the power coating – which seems really good – was in the threads. I only had two of what seems like a hundred bolts/screws you need for assemby; so that wasn’t a big issue. The comments also noted that there alignment was not always perfect. Again, I only had two holes that didn’t line up perfectly; I think that they were the same ones that had a little powder coat in them. The biggest problem was the so-called assembly instructions. They are not assembly instructions; they are the exploded engineering view. And the diagrams are tiny. Did I say they were terrible?
Anyway, it took about an hour, with the help of my son, to assemble. It really is a two-person job.
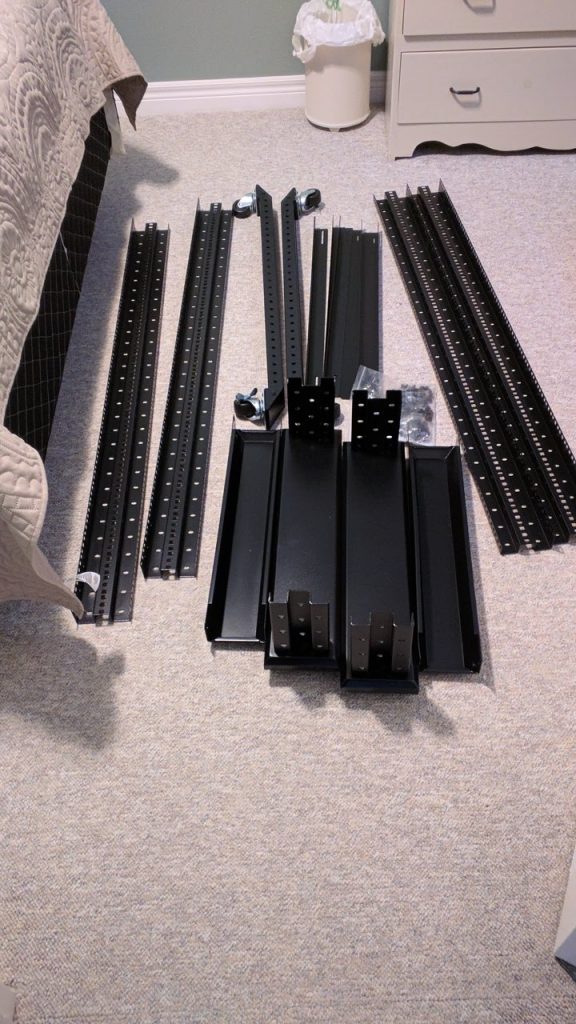
It starts out like this:
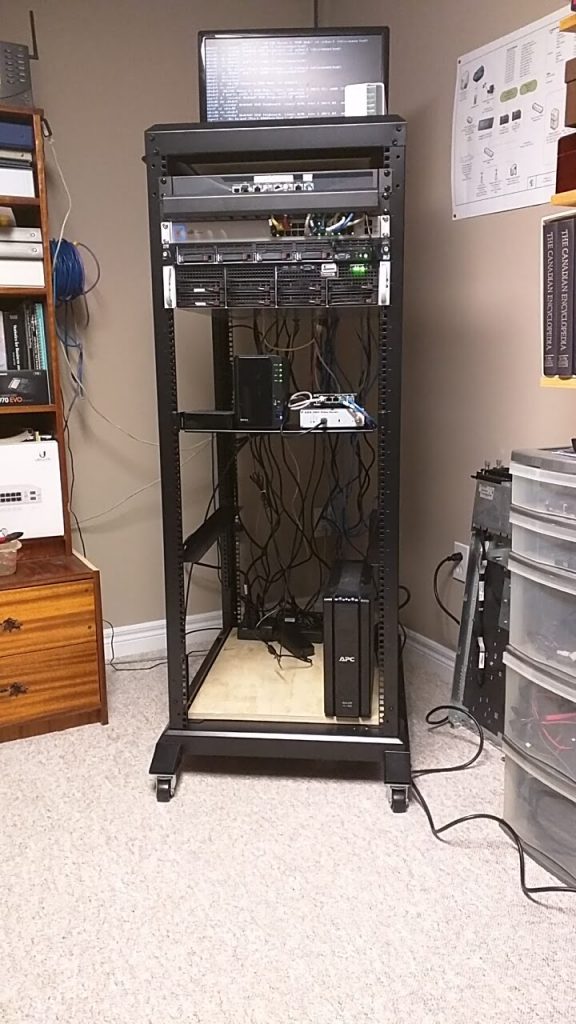
Once assembled it looks like this: You can see the Supermicro rails installed for testing. The shelf and the wire management are not included:
The next day, with the help of my son we stripped out all the equipment from my homemade rack. (I think he was eager to help when I mentioned all Interent access was going to be down until I had everything reassembled :-)). After about three hours of checking the mapping of server ports to switch ports it not looks like this. The one issue I has was that the I forgot that igb0 is on the bottom-left of the Supermicro NICs. Once that was done, everything was complete.
I still have to work on the vertical wire management which likely means that I need to get new network cables. That isn’t a bad thing because the new ones will be CAT6 and have some appropriate boots to keep the plugs from snagging on the other cables (and breaking off). The Supermicro bottom NICs have next to no room to apply pressure to depress a boot to remove the cable.
My netwok upgrade is not complete. The last two pieces were to replace the 1GigE switch in the TV room and the 10/100 Mbit/s switch in my son’s gaming room.
A few months ago, my son questioned why his gaming PC (i7-4970K, 16 GB RAM, GTX 1070 superclocked, GigE NIC) could only get about 97 Mbit/s. He knew that we have at least 500 Mbit/s bidirectionally. I finally fessed up and let him know that the switch that his PC (and the PS3, PS4 xbox 360) was an old D-Link DSS-8+. I mean really old; so old that I can’t even remember buying it. Actually, I think that it was a Christmas present.
The TV room had an more modern D-Link DSG-108G GigE switch. Thus, the old 10/100 Mbit/s switch connected to the GigE switch and then into the the UniFi Switch 24 because I had no easy way of running cable from the gaming room to the office (drywall instead of drop ceilings).
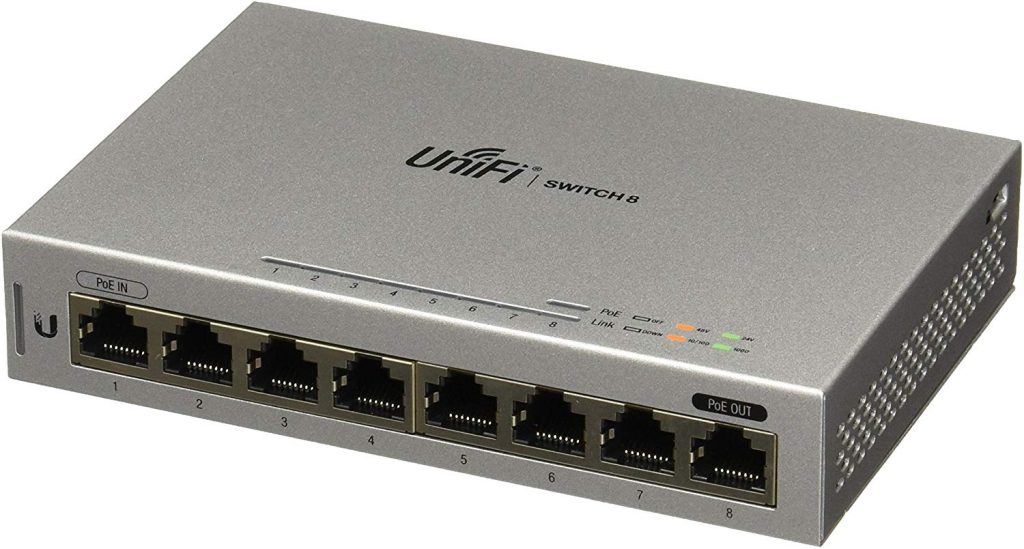
The solution, of course was more Ubiquiti UniFi gear. In this case, two UniFi US-8 non-PoE 8-port switches. I don’t need the full PoE swtiches (e.g. the US-8 60 watt or 150 watt switches). The US-8 does allow for PoE 48V Passive input to power it, and the US-8 will provide 48V Passive output using the included power adapter, it wouldn’t work over the run between the TV room and the gaming room. I don’t think that it is really supposed to work, anyway. It does work over a 30 cm patch cord, though.
Anyway, except for that old DSG-108G on my desk (two laptops and printer – I don’t want to backhaul 3 long cables from the desk to the UniFi Switch 24) and the 5-port GigE unmanged switch for the physical edge DMZ, everything is now UniFi.
The physical networking is now done. I still have some VLAN cleanup to do – move the IoIT devices onto the distrusted network (“untrusted” ain’t a real word, apparently). Everything is done now except a new cable run and a new, real rack. My birthday is coming up in a couple of months…
I had a question in the comments on the firewall rules and IGMP Proxy and pimd based upon the post DLNA: pfSense and IGMP Proxy – nope, use pimd. Unfortunately, I deleted that comment when cleaning out the spam (imagine that – a real comment!). To the commenter: Sorry ’bout that!
Anyway, when I was working on that issue, I had any-any rules in place between the server subnet and and client subnets. Since then, I have put my FreeNAS server in place with separate physical NICs (with VLANs coming – I’ll post on that) so the need to proxy IGMP is no longer an issue.
However, based upon some Google University research, I expect that you would need the following rules between your networks:
IGMP
port 5001 rule (TCP/UDP)
Port 2869 rule (TCP); used for DLNA / uPNP discovery (SSDP)
Port 1900 rule (UDP); used for DLNA / uPNP discovery (SSDP)
I received my second UniFi AP Lite yesterday. The plan was to have two APs in the house – one on each floor – from the beginning. The first AP was mounted in the basement ceiling which provided good coverage for the basement but parts of the main floor and outside the house were spotty. This was likely because of the floor in between the basement and the main floor. Outside was likely due to the concrete walls 🙂
The implementation was almost seamless – except for stupidity on my part. When I configured the port for the new AP, I added the management VLAN which allowed adoption and the firmware upgrade. However, clients could connect but would not maintain connectivity. The UniFi controller showed a boatload of DHCP failures. What was going on?
Well, another case of rushing things. If you have your WiFi network on different VLANs those VLANs also need to be applied to the switch port as well. Otherwise, when a client connects to a WiFi network, which is different from the management network, the switch ports sees the DHCP request and says “I don’t know about network x! Go away!”. Anyway, once I added the correct profile (I love the network profiles that Ubuquity has in their SDN) with all the right VLANs things go as smooth as silk.
So, the network upgrade is now 99% complete. WiFi connectivity is great across the basement and main floor. I can actually now get a reliable, albeit a little weak, WiFi connection in my shed. I still have to replace some cable runs with Cat5e or Cat6 and desperately need to clean up the rat’s nest in the server rack. Maybe Santy Claus will help me out there.
Well, I’m just about finished my core network upgrade that I started, really, last winter. Here’s what has transpired since Christmas (links to posts, etc. in line):
Santa bought me a TP-Link TL-SG1024DE. It gave me the VLANs I was looking for but it didn’t give me everything I was looking for but it worked for now.
The old SonicWall TZ205W was getting a little long in the tooth and I replaced it with a pfSense box.
The Netgear/D-Link access points being manually configured bugged me so I bought a Ubiquiti UniFi AC AP Lite.
Since the TP-Link switch wasn’t doing it for me and I liked the Ubiquiti gear so much I replaced it with a Ubiquiti Switch 24.
I hated the wire rack I was using for the network and server gear so I replaced it with a homemade one.
Three NASes were too much even for a geek like me and they needed an upgrade. So three of the NASes, one with an external hardware eSATA disk enclosure, were replaced with a Supermicro Server with FreeNAS.
So, what’s next? There are three empty drive bays in the FreeNAS box. I will eventually be setting up a RAIDZ pool for my ESXi NFS shares. And, of course, there are the two Quanta S98J QSSC 1U rackmount server cases. I need another HBA, external cables, and drives to make them useful.
A quick post on fixing error: environment block too small
I updated my Linux Mint 19.2 which included an updated kernel and this error started occurring at boot before the grub menu. You have to “hit any key to continue” but boot will continue. Very annoying. Removing some of the old kernels didn’t work. The solutions is relatively simple:
sudo rm /boot/grub/grubenv
sudo grub-editenv /boot/grub/grubenv create
This apparently relates to the size of the UEFI partition – or lack thereof. I first came across the issue when trying out System76’s Pop!_OS. I dual boot with Windows 10 (go ARMA Exile mod!) and the UEFI partition was too small. After a whole bunch of, err… farting around, I finally got Pop!_OS to install. Very nice OS but not quite to my taste. Try it out, though, for yourself. It might be your’s!
I’m well on my way through my FreeNAS build. For my boot drive I picked up two Kingston 120GB A400 SSDs on Amazon for CDN$25 each. That is only slightly more expensive than a “good” USB memory stick. These are mirrored and plugged into the two SATA3 (6Gb/s) ports on the motherboard.
The Qnap NAS has been decommissioned with the two 3 TB WD Reds added to FreeNAS. The 3 TB Red my son had “borrowed” for his gaming PC has been “reacquired.” My “spare” 3 TB Red has been added to FreeNAS and I bought another 3 TB Red. That has been made into a RAIDZ2. RAIDZ2 is like RAID6. You get double parity to tolerate multiple disk failures. That gives me 7.4 TB of usable space.
I have two MiniDLNA servers running is jails on the two different subnets getting rid of the IGMP proxy I noted in my previous post. The great thing is that the same volume groups (one for music, one for movies) can both be used by each of the MiniDLNA servers so I don’t need to duplicate storage.
Next item is dealing with NFS, physical interfaces and subnets for sharing space with my ESXi server.